
Installation across Romania
The NEX Thermo team also provides installation services. Tell us your project location and approximate façade area so we can discuss the work and prepare a quote.
Request a quote for panels and installation →Decorative insulated panels are installed as a modular system, using adhesive bonding and mechanical anchoring in accordance with the project specification and technical instructions.
INSTALLATION, STEP BY STEP
See how the panels are installed
Watch the installation video, then explore the steps and system diagram below.
Installation steps
Preparing and marking the surface
Cutting and preparing panels on site
Positioning panels and checking alignment
Mechanical fixing and joint sealing
Installation system structure
The diagram shows the panel layers and fixing components.
The structure varies by system. EPS and graphite EPS panels consist of the insulation material and decorative board, without a backing board. The backing board shown in this diagram does not apply to these two options.
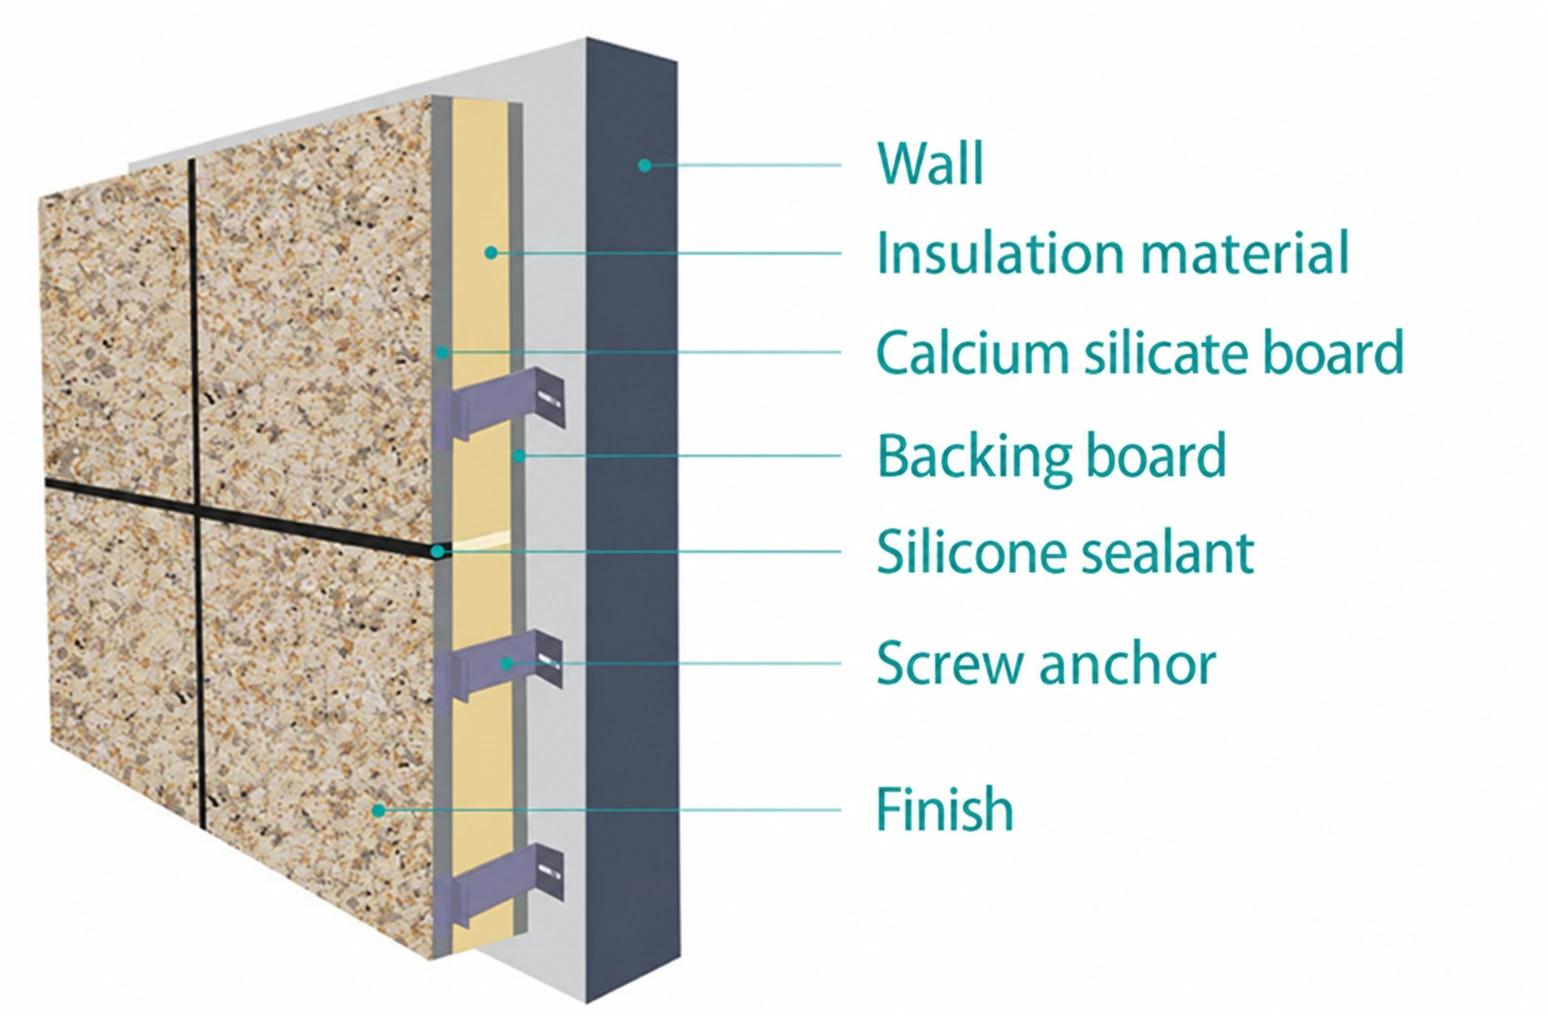
View the components in the diagram
Image labels, from top to bottom:
- Wall
- Insulation material
- Calcium silicate board
- Backing board
- Silicone sealant
- Screw anchor
- Finish
Fixing panels and sealing joints
The two demonstration panels show how the decorative boards join together and which accessories are used for installation. The system combines adhesive mortar bonding with mechanical fixing; the joints between panels are then filled and sealed.
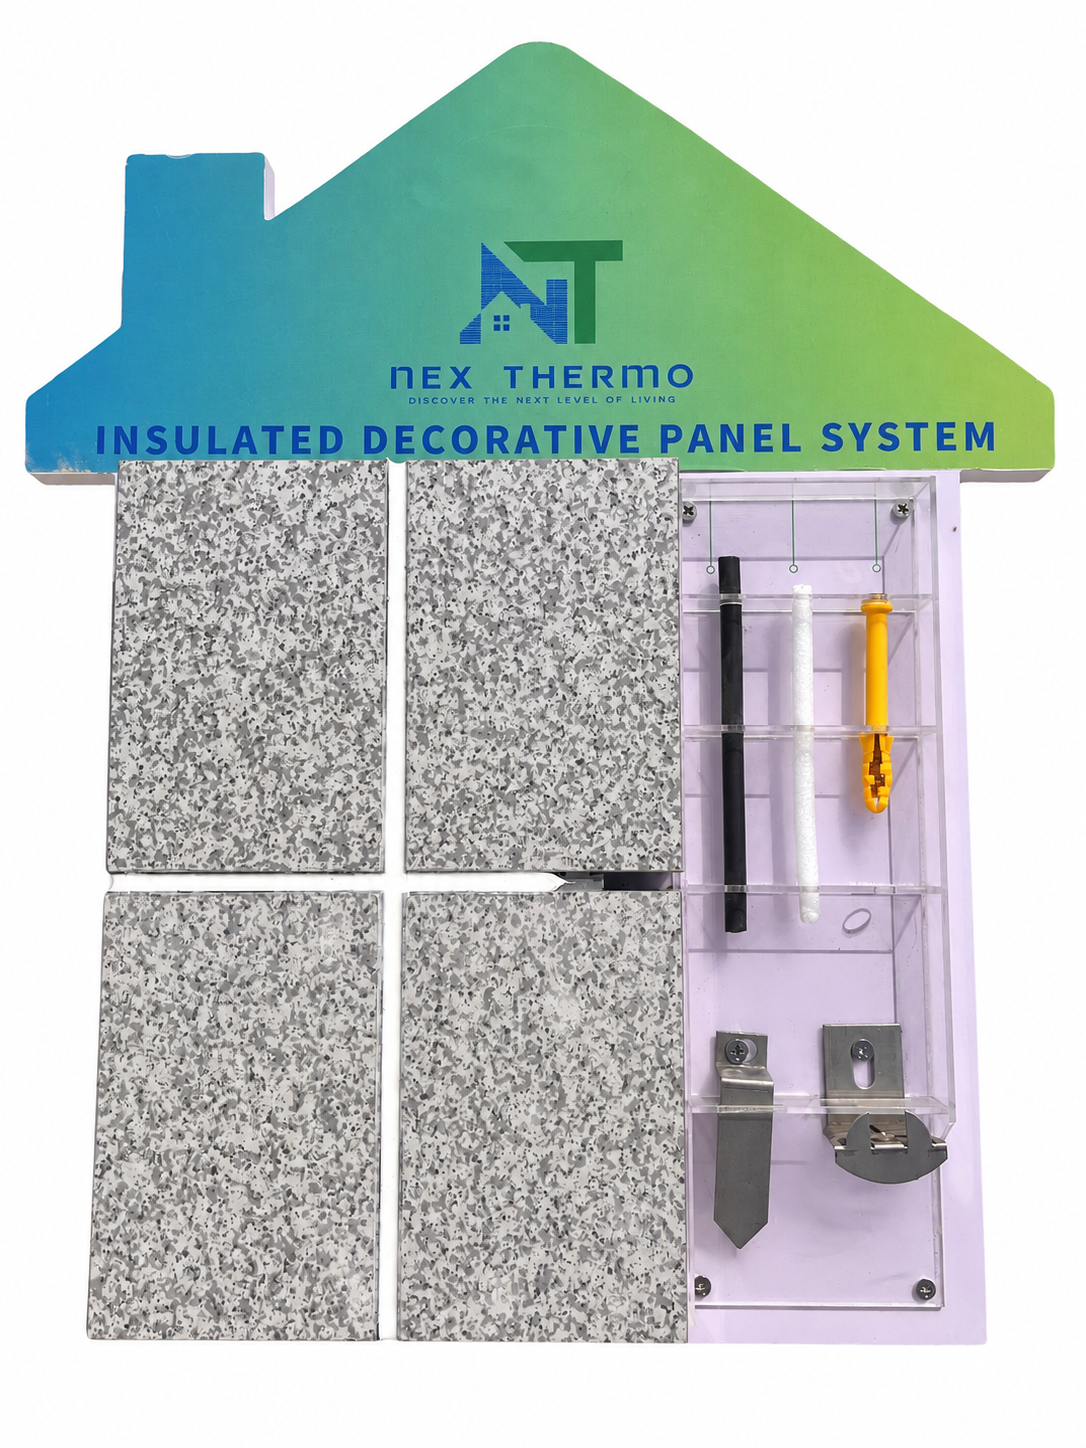
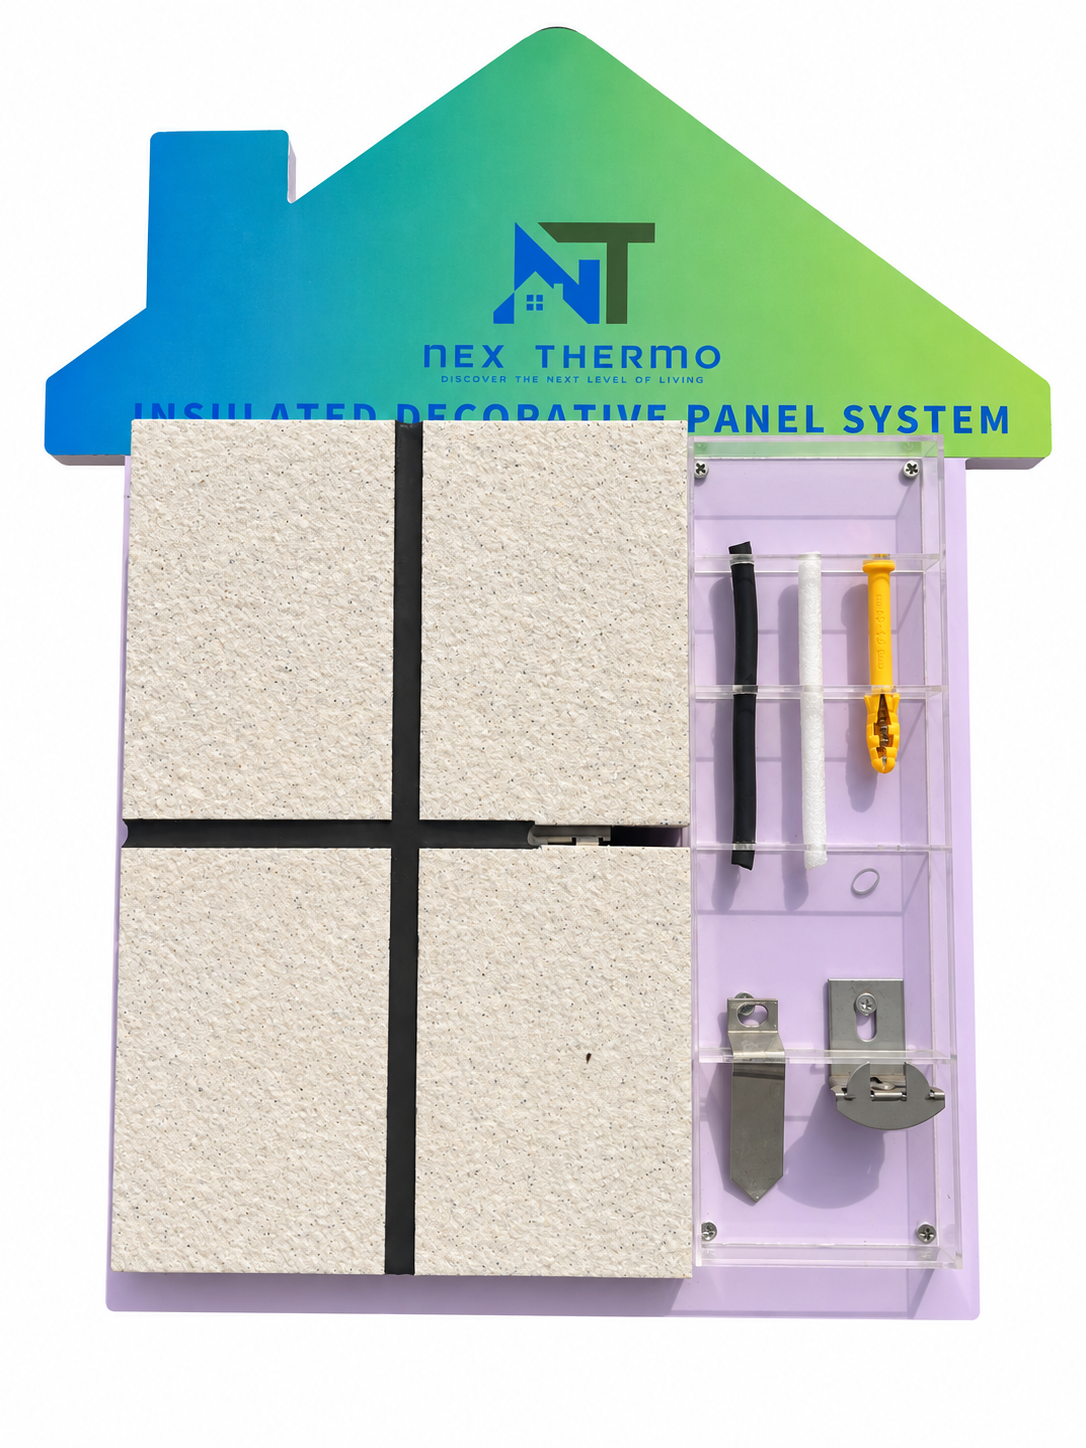
Select the images to view the details at a larger size.
Butterfly anchors
Butterfly anchors provide additional mechanical fixing of Nex Thermo panels to the wall structure.
Fixing plugs and screws
These secure the metal components to the wall structure. The fixing type and anchor positions are determined by the substrate and installation specification.
Joint filler
After the panels are fixed, the gaps between them are filled with insulating foam strips. These fill the joint before sealant is applied and help maintain the continuity of the thermal insulation.
Silicone sealant
Applied evenly and continuously along the joints to seal them. Masking tape protects the board edges and helps create straight, clean joints.
The number and arrangement of anchors, joint dimensions and installation materials must follow the chosen system and the technical instructions for the project.
Planning a project?
Contact the Nex Thermo team for details about your chosen system and installation.
Talk to the Nex Thermo team →